
How To Enhance Your DIY Meat Probe with Voice Control Features
Every culinary enthusiast knows the importance of a perfectly cooked steak, and that’s where a meat probe comes in handy. But what if we could

The discovery of rust on your meat probe can be a real headache for any culinary enthusiast. This critical tool in your cooking arsenal needs to be in top shape for accurate temperature readings. In this guide, we’ll cover everything from identifying rust to effectively dealing with it, ensuring your meat probe remains a reliable companion in your kitchen adventures.
Before jumping into rust removal, it’s crucial to know what you’re dealing with. Recognizing rust on your meat probe is the first step to restoring its functionality.
Inspect your meat probe regularly, focusing on the metal rod, as this is where rust typically forms. Look for any discoloration or orange-brown spots, which are telltale signs of rust. Ensure good lighting while inspecting, as some rust spots can be subtle.
In some cases, rust may appear as a rough texture or pitting on the surface. Be thorough in your inspection, as even small areas of rust can spread if left untreated.
If you notice any unusual readings or fluctuations in temperature, this could also indicate a problem with the probe, possibly related to rust or other damage.
Rust on a meat probe can affect its performance and accuracy. It can also lead to contamination of food, making it essential to address rust as soon as it’s spotted.
Even small amounts of rust can interfere with the probe’s temperature sensitivity. Rust can also compromise the structural integrity of the probe, potentially leading to breakage or failure during use.
In addition to the practical implications, rust can be a health concern, as it may flake off into food, posing a risk of ingestion. Understanding these risks underscores the importance of regular maintenance and prompt action when rust is detected.
The best approach to rust is prevention. Understanding how to care for your meat probe can save you time and effort in the long run.
Selecting a meat probe made from high-quality, rust-resistant materials like stainless steel is a good start. Proper usage, such as avoiding prolonged exposure to moisture and acidic foods, also plays a crucial role in preventing rust.
When using the probe, avoid leaving it in the meat for longer than necessary, especially in humid or wet conditions.

After use, clean and dry the probe promptly to prevent any moisture retention, which can lead to rust.
Additionally, avoid using metal scrubbers or abrasive cleaners on the probe, as these can damage the protective coating and make the metal more susceptible to rust.
Store your meat probe in a dry, clean place. Moisture is the enemy of metal, so ensure your probe is completely dry before storing. Consider using a protective cover or case to shield it from environmental factors that could lead to rust.
Do not store the probe in areas with high humidity, such as near a dishwasher or sink, or in outdoor kitchens where it might be exposed to the elements.
If possible, store the probe in an area with controlled temperature and low humidity to further reduce the risk of rust.
In addition, keeping the probe separate from other metal tools or utensils that could scratch its surface, as even minor damage can expose the metal to air and moisture, increasing the risk of rust.
If you spot rust, don’t panic! Early-stage rust can often be removed with some simple cleaning methods.
Mix warm water with a mild detergent and gently clean the affected area of your meat probe. Using a soft cloth or sponge, carefully scrub the rust spots, taking care not to damage the probe.
Rinse thoroughly and dry immediately after. For small rust spots, a paste made from baking soda and water can be applied directly to the rust. Allow the paste to sit for a few minutes, then gently scrub with a soft cloth.
Baking soda is a mild abrasive that can help remove rust without damaging the metal. Always ensure that the probe is completely dry after cleaning to prevent further rust development.
It’s crucial to use non-abrasive tools for cleaning your meat probe. Avoid steel wool or harsh scrubbers, as these can scratch the surface and make the rust issue worse.
Soft brushes or baking soda can be effective for mild rust. If the rust is in a hard-to-reach area, use a cotton swab or toothpick wrapped in a soft cloth to gently clean the spot.
For probes with more intricate designs or crevices, a soft-bristled toothbrush can be used to reach these areas without causing damage. Remember to always be gentle during the cleaning process to avoid causing any additional damage to the probe.
For more stubborn rust, a deeper cleaning method may be necessary. There are several household items you can use to effectively remove rust.
Common household items like white vinegar, lemon juice, or baking soda are excellent for tackling rust. Soak a cloth in vinegar or lemon juice and wrap it around the rusted area of the meat probe.
For baking soda, apply a paste to the area and gently scrub. Vinegar and lemon juice are natural acids that can help dissolve rust. Soak the affected area for several hours or overnight for more severe rust.
After soaking, use a soft cloth to gently rub the rust away. Rinse thoroughly with water and dry immediately. These methods are effective for removing surface rust without the need for harsh chemicals.
Leave the vinegar or lemon juice in the rusted area for a few hours, then gently scrub the rust away. With baking soda, let the paste sit for an hour before scrubbing.
Always rinse and dry the probe needle thoroughly after using these methods. For tougher rust, you may need to repeat the process a few times. Be patient and avoid using excessive force, as this can damage the probe.
Once the rust is removed, it’s important to properly dry the probe and apply a light coat of food-safe mineral oil to protect the metal and prevent future rust. This oil creates a barrier that helps to keep moisture away from the metal.
After successfully removing rust, regular maintenance is key to keeping your meat probe in optimal condition.
Clean your meat probe after each use and inspect it regularly for any signs of rust or wear. Regular cleaning not only prevents rust but also ensures the probe remains hygienic and safe for use.
Use a mild detergent and warm water for regular cleanings, and avoid leaving the probe in water for extended periods.
Dry the probe thoroughly after each cleaning. Regular inspections can help you catch rust early, making it easier to manage and less likely to cause permanent damage.
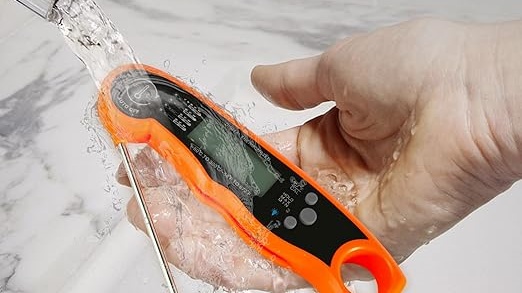
Keep your meat probe dry and store it properly. If your probe is not waterproof, be cautious not to let water seep into any electronic components.
Regularly check for any damage that might expose metal parts to moisture. Store the probe in a location where it won’t be knocked around or scratched, as physical damage can also lead to rust.
If your probe has a removable battery, remove it before storing the probe for extended periods to avoid battery leakage, which can cause corrosion. Additionally, consider using a desiccant or silica gel packet in the storage area to absorb any excess moisture.
Sometimes, despite your best efforts, a meat probe might be beyond saving. Knowing when to replace it is crucial for your cooking accuracy.
If rust persists after cleaning, or if the probe’s accuracy is compromised, it might be time for a replacement. Regularly failing to give accurate readings is a clear sign that your probe needs to be replaced.
If the rust has penetrated deeply into the metal or if there are signs of pitting, the structural integrity of the probe might be compromised, making it unsafe for continued use.
Additionally, if cleaning and maintenance become too frequent or laborious, it may be more practical to invest in a new probe.
When buying a new meat probe, look for one made of high-quality, rust-resistant materials. Consider features like ease of cleaning, durability, and accuracy in readings.
Opt for probes with good user reviews and reliable warranties. Read the manufacturer’s instructions regarding care and maintenance, as this can vary between different models and types.
Consider the type of cooking you do most often and choose a probe that is best suited to your needs. A quality meat probe is an investment in your cooking, ensuring that your dishes are cooked to perfection every time.

Dealing with rust on your meat probe doesn’t have to be a daunting task. With the right care and maintenance, you can keep your probe in excellent condition, ensuring precise cooking and delicious results.
Remember, a well-maintained meat probe is an essential tool in any chef’s arsenal, making every culinary challenge a delightful experience.