
How To Enhance Your DIY Meat Probe with Voice Control Features
Every culinary enthusiast knows the importance of a perfectly cooked steak, and that’s where a meat probe comes in handy. But what if we could

Have you ever wished for a wireless meat probe that could meet all your specific cooking needs? Imagine being able to monitor your roast or barbecue from anywhere in your home!
In this DIY guide, we’ll take you through creating your own wireless meat probe, combining technology with culinary art for the perfect cooking experience.
Creating a DIY wireless meat probe starts with a solid plan and a clear design. This initial stage is crucial to ensure the functionality and feasibility of your project.
Before diving into the building, consider the essential features your wireless meat probe should have. Think about the range of temperatures you’ll be dealing with, and whether you need features like instant read or continuous monitoring.
For a more advanced setup, you might want to include alerts or notifications when your food reaches a specific temperature.
Decide if your probe will be used indoors, outdoors, or both, as this will determine the necessary durability and weatherproofing. Additionally, the length and thickness of the probe should be appropriate for the types of food you commonly cook.
In designing your wireless meat probe, the choice between Bluetooth and Wi-Fi is critical. Bluetooth is generally easier to set up and is ideal for shorter distances, such as in a home kitchen.
Wi-Fi, on the other hand, offers longer-range connectivity, which can be beneficial for outdoor cooking or monitoring from different rooms.
Your design should also factor in power requirements — whether the probe will be battery-powered or rechargeable. Consider the placement and protection of the battery, especially in high-heat environments.
The success of your DIY wireless meat probe greatly depends on the quality and suitability of the materials and components you choose.
For your wireless meat probe, you’ll need a temperature sensor capable of withstanding high temperatures, like a K-type thermocouple. A microcontroller, such as an Arduino or ESP32, will serve as the brain of your probe, reading the temperature and handling wireless communication.
Choose a wireless module compatible with your chosen microcontroller — Bluetooth modules for short-range or Wi-Fi modules for long-range communication. Other materials include heat-resistant wires, a power source (like a lithium battery), and possibly a small OLED display for immediate temperature readouts.
When purchasing parts, prioritize quality and durability, especially for the temperature sensor and wireless module. Reliable suppliers often provide detailed specifications and support, which can be invaluable for DIY projects.
For microcontrollers and wireless modules, consider community support and available libraries, as these can greatly simplify programming.
When selecting a battery, look for one that offers sufficient capacity while being compact enough to fit your design.

Remember, the goal is to balance cost, functionality, and ease of assembly. It’s also wise to purchase a few extra components, especially smaller items like resistors or capacitors, in case of errors or faulty parts.
Putting together your wireless meat probe involves careful assembly and hardware configuration. This stage requires attention to detail to ensure all parts function harmoniously.
Assembling your wireless meat probe begins with connecting the temperature sensor to the microcontroller. This typically involves soldering, so a steady hand and attention to detail are crucial. Once the sensor is connected, integrate the wireless module.
Ensure all connections are secure and check for any potential short circuits. If your design includes a display, connect it to the microcontroller using appropriate communication protocols like I2C or SPI.
Finally, connect the power source, making sure to incorporate any necessary voltage regulators or protection circuits.
The hardware configuration of your wireless meat probe largely depends on the microcontroller and wireless module you’ve chosen.
For example, if using an ESP32, you might utilize its built-in Wi-Fi capabilities. This would require configuring the GPIO (General Purpose Input/Output) pins to correctly read the temperature sensor and communicate wirelessly.
Carefully follow the data sheets and technical documentation for each component to ensure proper configuration.
Proper insulation and protection of the assembled unit are crucial, especially around the sensor, which will be exposed to high temperatures.
A DIY wireless meat probe isn’t just about hardware; software plays a crucial role. Programming the microcontroller and setting up the wireless connectivity are key steps.
Programming your wireless meat probe involves writing code that accurately reads the temperature from the sensor and transmits it to your device.
If you’re new to programming, there are plenty of resources and community forums that can help you get started.
For Arduino-based projects, the Arduino IDE provides a user-friendly platform for writing and uploading code.
Your code should include functions to read temperature data from the sensor, process it, and send it over the chosen wireless communication method.
For wireless connectivity, your code must include the necessary protocols to establish and maintain a connection, whether it’s through Bluetooth or Wi-Fi.
For Bluetooth, this might involve setting up the module in slave mode and pairing it with a smartphone.
For Wi-Fi, you’ll need to program the probe to connect to your network and possibly set up a server to receive the data.
You might also want to create a simple app or interface on your smartphone or computer to view the temperature readings in real-time.
Testing and calibrating your wireless meat probe are critical to ensure its accuracy and functionality. This process helps fine-tune the device for optimal performance.
Once assembled, testing your wireless meat probe is essential to ensure it works correctly. Start by testing its basic functionality in a controlled environment, like room temperature. Then, proceed to more challenging conditions, such as boiling water or an ice bath, to verify its temperature accuracy.

Compare the readings from your probe with a known accurate thermometer to check for discrepancies. It’s also important to test the wireless communication range and stability to ensure you can reliably receive temperature data from your desired distance.
If you find discrepancies during testing, calibration is necessary. This might involve adjusting the code for temperature conversion or fine-tuning the sensor’s readings. Calibration can be as simple as adding or subtracting a fixed offset to the readings or as complex as implementing a calibration curve in the code.
It’s essential to repeat the testing process after calibration to ensure the adjustments have corrected the inaccuracies. Document your calibration steps and results for future reference, as this will be helpful if the probe needs recalibration.
Ensuring the safety and protection of your wireless meat probe is paramount, especially considering its exposure to food and high temperatures.
When designing and assembling your wireless meat probe, safety should be your top priority. Ensure all components, especially those in contact with food, are food-safe and can withstand high temperatures. The probe should be waterproof or at least water-resistant, as it will likely come into contact with liquids.
For the electronic parts, consider heat-resistant enclosures and adequate insulation to protect them from the high temperatures typically encountered during cooking.
Designing a protective casing or enclosure for your wireless meat probe not only enhances safety but also extends the life of the probe. Use materials that are heat-resistant, like silicone or high-temperature plastics, and ensure they are food-grade.
The casing should protect the electronic components from heat and moisture while allowing the temperature sensor to accurately measure without interference. If the probe includes a battery, ensure that the casing allows for easy battery access for replacement or charging.
Proper usage and regular maintenance are key to ensuring your wireless meat probe remains a valuable tool in your culinary toolkit.
To get the best out of your DIY wireless meat probe, use it correctly and according to the specifications you designed it for. Insert the probe into the thickest part of the meat, avoiding bones or fat pockets for accurate readings.
Monitor the temperature remotely and avoid leaving the probe in the heat for longer than necessary. If your probe is designed with specific features like alarms or alerts, familiarize yourself with these functions for efficient cooking.
Maintaining your wireless meat probe involves regular cleaning, careful storage, and periodic battery checks. Clean the probe after each use, ensuring that no food particles or grease are left on the sensor.

Store it in a safe, dry place to protect it from damage. For troubleshooting, common issues might include connectivity problems, inaccurate readings, or battery issues. Keeping a troubleshooting guide or notes on how you assembled the probe can be invaluable for quick fixes.
Building your own wireless meat probe is not only a rewarding DIY project but also a fantastic addition to your cooking tools, offering convenience and precision. By following these guidelines, you can create a reliable, custom-made probe that suits your specific culinary needs.
Enjoy the process of combining technology and cooking, and revel in the accuracy and control you gain in your culinary creations. Your homemade wireless meat probe is sure to be a conversation starter and a valuable asset in your kitchen.


Every culinary enthusiast knows the importance of a perfectly cooked steak, and that’s where a meat probe comes in handy. But what if we could

When it comes to cooking perfection, a meat probe is an indispensable tool for any chef or home cook. But in the world of meat

The moment you bring a meat probe into your kitchen, it’s not just about cooking anymore; it’s about precision, about transforming an ordinary meal into

Ever questioned if a meat probe could be your secret weapon for the perfect roast chicken? It’s a culinary showdown: the precision of a meat

Every culinary enthusiast knows the importance of a perfectly cooked steak, and that’s where a meat probe comes in handy. But what if we could

When it comes to cooking perfection, a meat probe is an indispensable tool for any chef or home cook. But in the world of meat

The moment you bring a meat probe into your kitchen, it’s not just about cooking anymore; it’s about precision, about transforming an ordinary meal into
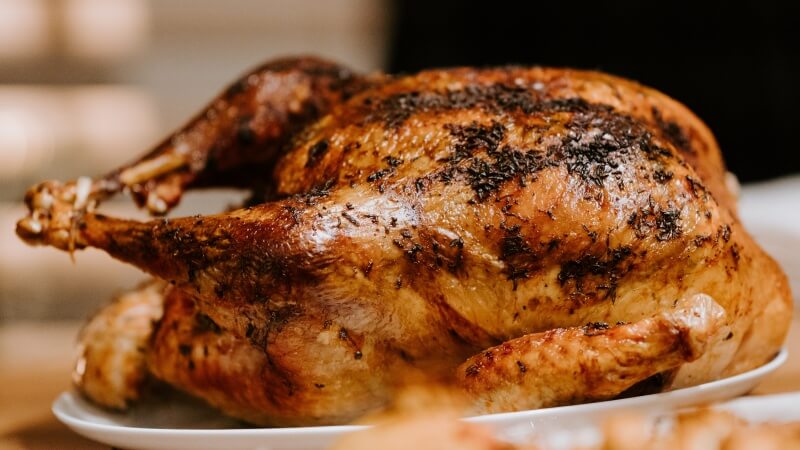
Ever questioned if a meat probe could be your secret weapon for the perfect roast chicken? It’s a culinary showdown: the precision of a meat
Copyright © 2024 meaterprobe. All Rights Reserved.